Sunday, September 28, 2014

{SCRLLC14} Scripture Lesson #17, He Knows

These past couple of weeks, God has been talking to me about burdens. First, as I was listening to KLOVE driving to an appointment, I heard Lisa TerKeurst say, "Don't miss the blessings because you are focusing on the burdens." I immediately called my daughter and asked her to write it down for me so I would not forget. Such a beautiful quote that I needed to hear. Then my second daughter calls me from college, and she asked me if I have heard of the new song by Jeremy Camp called "He Knows." I told her I had not, and she told me that I needed to listen to it. So, off I went to search for the song. It is a new release so it's a bit hard to find but if you click here, you can listen to it. Look what the chorus says:

Chorus
He knows, He knows
Every hurt and every sting
He has walked the suffering
He knows, He knows
Let your burdens come undone
Lift your eyes up to the One
Who knows, He knows

To read all of the lyrics, click here. I encourage you to read them because they are very powerful.

And did you notice that word againburdens? Moses in Numbers 11:14 cries out to God "I cannot carry all these people by myself; the burden is too heavy for me."

Notice how Moses turns to God with his burdens. Are your burdens pushing you towards the Lord to seek Him and trust Him more? Or are you heavy on complaining? Our reactions to our burdens and trials reveal our true spiritual maturity. We need to trust Him, depend on Him, and glorify Him. When we truly rely on Him, we are not shaken by the burdens and chaos among us. He gives us purpose in our trials. His love and peace are abounding! If you feel like you are burdened and your load is too heavy, remember the Lord is there to help you. Will you trust Him?

Psalm 68:19 "Praise be to the Lord, to God our Savior, who daily bears our burdens."

Isaiah 26:3 "You will keep in perfect peace those whose minds are steadfast, because they trust in You."

Matthew 11:28 "Come to me, all you who are weary and burdened, and I will give you rest."

Galatians 6:2 "Carry each other’s burdens, and in this way you will fulfill the law of Christ."

1 John 5:3-4 "In fact, this is love for God: to keep His commands. And His commands are not burdensome, for everyone born of God overcomes the world. This is the victory that has overcome the world, even our faith."

I decided to do an 8 1/2 x 11 page today. I printed some black and white images of the things that are going on in our family nowspinal problems, canine epilepsy, Chiari Malformation, etc., etc., etc. If I focused on these things instead of the Lord, I would be utterly overwhelmed, miserable, and defeated. Do I struggle each day? Yes, but I must remember to make Him the focus knowing He has a plan and that we need to glorify Him through it. I trust that, and it's what keeps me going.

I used black and white photos because these 'things' needn't be my focus. The colorful paper with the scripture is what should be my focus. I need to cling to Him and His Word! I also used a sketch that I have had pinned for a while. You can see the sketch by clicking here.  And finally, I used the new Blue Fern Studios paper line called Montage and the chipboard pieces Circle Code and Adore, Love, Cherish.


Papers: Blue Fern Studios Montage Wisdom and Invitation, Paper Trey Ink cs 
Stamp: Our Daily Bread Designs Scripture Collection 7 
Stamp Ink: Versa Fine onyx black, Tim Holtz Distress Ink black soot 
Blue Fern Studios chipboard: Circle Code (painted w/Adirondack Dabber lemonade and Jenni Bowlin Dabber malted milk), Adore, Love, Cherish (painted w/black gesso and Glossy Accents)
Embellishments: Wild Orchid Crafts flowers, Prima Bistro Blooms Nugget and Soubrette orange flower, Prima packaging, Bella Blvd. washi tape, misc. cheesecloth, sewing machine

Remember to use Keyword SCRLLC14 when posting your creations in any online galleries. Also, please leave a link to your creation here using Inlinkz! To see all of the information regarding this challenge and the previous studies, please see this post here. Blessings, and I pray that you allow Him to carry your burdens!

Wednesday, September 24, 2014

Journaling {Bible} Mark 6:48-51

Have you ever heard that there is no such thing as a coincidence? Well, there certainly is not, and when I see those moments of what people would call a "coincidence," that's when I see God so very clearly. That is what happened with today's scripture.

I was going through my old sermon notes to see what I wanted to study and put into my Journaling Bible when the words at the top of a page caught me. They said "Jesus is Enough." I knew then that this is what I would be studying again and putting into my Journaling Bible. Well, a week passed, and the notes stayed open on my desk. I hadn't had time to create or study further as we have had a lot going on. Two of our daughter's have been having many health issues, and so I put this aside. Then on Sept. 11, one of our girls called from school and told us how bad her sister was doing. She said "Mom, we heard in chapel tonight that Jesus is Enough, and I told 'sister' about it and reminded her that He is enough!" I cried as she had no idea that those were the exact same words that God reminded me of the week before. I knew for certain that this is what God wanted our struggling daughter to hear. I have shared it with her almost daily since this happened a couple of weeks ago. She even has it pasted on her bathroom mirror in her dorm room now. God is SO good! So, if you are struggling, remember:

"Jesus is enough. He is enough for us to weather any storm."

It's not that we are enough or that we have what we need to make it through the stormsit's all Him! Rely on Him. He will carry you and help you through any storm in life that comes your way.

And if you want to know how to make the colorful circles I used on this page, please see my tutorial I posted yesterday by clicking here. I hope you have enjoyed today's post and that it ministers to you in some way. Joyfully in Christ,

Tuesday, September 23, 2014

Tuesday's {Tip} Making Painted Circles


I think most of you know how I love to use circles and hearts on my work. Circles are the easiest and most fun for me to use. I think I put them on just about everything. If you remember my BSF journal that I posted the other day, I painted some circles on it. To see that entire post, click here. See the three orange, teal, and pink circles? Today, I want to show you how I made them. They are fun and easy to do. 

Supplies
Paper of any sort (ledger paper, book paper, deli paper, printer paper, etc.)
Circle Stencil
Acrylic paints in various colors (choose 3)
1" flat wash paintbrush
Thin round paintbrush
Water
Stabilo All pencil
Scissors
Glue stick or other glue
Black waterproof pen
White gesso
White correction pen

Step-by-Step Instructions

1. Take any piece of paperbook paper, vintage paper, printer paper, deli paperwhatever you have on hand. I have an old ledger from the late 1800's/early 1900's that I love to use. That is the paper I used here.

2. Grab your favorite circle stencil and place on top of the paper you chose from above.

3. Place 3 colors of paint onto your palette.

4. Get a paintbrush and a jar of water. I use the Simply Simmons 1" Flat Wash brush . It's one of my favorites.


5. Dip your paintbrush into the jar of water and get it really wet. I like to water down the paint for this. Then dip the wet paintbrush into the first color of paint.

6. Paint a half circle over the stencil you placed on top of your paper in Step #2. Move the stencil and do this several times all over your paper with that paint color making several sizes of circles.

7. Clean stencil and paintbrush, and repeat Step #6 with your second paint color.

8. The third paint color I actually paint on with my finger. In the above photo, you can see the teal is the last color I used and painted with my finger.

9. After the circles are dry, use a Stabilo All pencil to draw circles around each painted circle. I use my stencil for this also. Then go over those pencil lines with a thin round paintbrush dipped in water. It turns the pencil into a bit of watercolor as you can see below.

10. Cut the circles out. Yes, some of the Stabilo pencil lines will be lost but not all. You will draw around these circles again in another step.

11. Glue the circles to your piece (art journaling page, scrapbook layout, Journaling Bible, altered art, etc.) using a glue stick or other glue. Gel medium works great too.

12. Next use a waterproof pen (Copic Multiliner, Sakura Pigma Mircon pen, etc.) to doodle around the circles. I scribble circles around and then scribble lines through the sides a couple of times.

13. To finish, enchance with white gesso and a white pen (I use the Sailor Mini Correction Pen). The white gesso I also paint on with my finger.

I hope this tutorial has been helpful. Have fun making those circles! Blessings,

Sunday, September 21, 2014

{New Paper} In Action!

I am so excited to share the new Blue Fern Studios Montage papers with you this month along with some of the new chipboard pieces. Let's look at what I have for you today.

A Joyful Heart
For this 8 1/2 x 11 layout, I traced one of the Graduated Squares chipboard pieces onto the Montage Bouquet paper and cut it out to use as a third square on the layout.

Also, when trimming this gorgeous 12x12 piece of Montage Fairyland paper down to 8 1/2 x 11, I unfortunately had to cut off two of the beautiful edges. But it was easily solved. I stitched the bottom piece back onto the layout. I chose to leave the right edge bare but I could have easily stitched that on also. So don't ever hesitate to cut down these papers for smaller layouts.


To treat the chipboard pieces, I painted them all in black gesso. Easy but I love the "pop" that black provides to a creation.
Blue Fern Studios products used:
Montage Fairyland
Montage Bouquet
Graduated Squares chipboard

What a Day
For this 8 1/2 x 11 layout, I used several new pieces of Blue Fern Studios chipboardWhat a Day, Printer's Bits, and Arrow Words. I just love all of these pieces. The gorgeous papers I used are Montage Now and Then and Calling Cards.

Again, I covered most of the chipboard pieces in black gesso except the Printer's Bits (the number 20). I used gelatos to color the numbers and then covered each one in Glossy Accents.

Blue Fern Studios products used:
Montage Now and Then
Montage Calling Cards
What a Day chipboard
Printer's Bits chipboard
Arrow Words chipboard

Thanks for stopping by, and I hope you have enjoyed seeing the newest products from Blue Fern Studios in action! To see more wonderful creations, be sure to subscribe to the Blue Fern Studios blog! You won't miss a thing that way. :) Blessings,

Tuesday, September 9, 2014

Tuesday's {Tip} Using Deli Paper

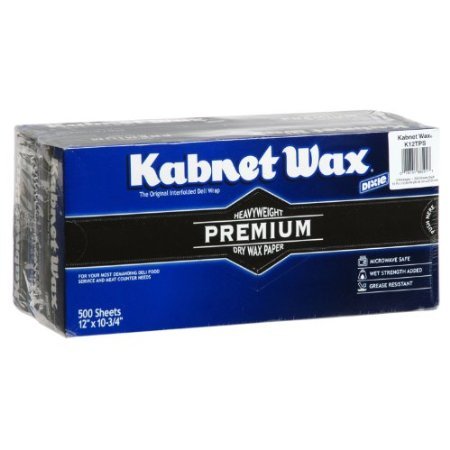
Deli paper is similar to wax paper or tissue paper. Think of a combination of the two. One side of the deli paper is waxy; the other side is not. Deli paper is moisture proof. I have used deli paper for quite some time, and it has come in handy for my Journaling Bible entries also. Today I wanted to share with you some ways I use it, and I hope you will find it helpful.

Where to Buy
Deli paper can be found on amazon.com. Search on 'Kabnet Wax' and you will find many different sellers. I also understand it can be found at Sam's Club or Costco. I personally do not shop at either of these stores but I have heard you can find it there.

How to Use in Journaling Bible
I use deli paper in may ways but today I wanted to share how I use it to stamp on and put in my Journaling Bible. This technique, of course, could be used for other creations too
  • On scrapbook pages if you are scared to stamp directly on your page
  • In art journals
  • On cards
  • Anywhere!
To use it for stamping in my Journaling Bible, here is what I do:

1. Place a piece of deli paper on your table.
2. Put some white gesso on a piece of bubble wrap.
3. Stamp the bubble wrap all over the deli paper on the non-waxy side. You may need to add more gesso to the bubble wrap to cover the entire piece of deli paper. You can also use a paint brush, sponge, or anything else you like. I just personally love the bubble wrap. :)
4. Let dry.
5. You now have the perfect background for adding stamped images to the deli paper.

6. Stamp your image on the non-waxy side, and let dry. I use Archival inks for this.
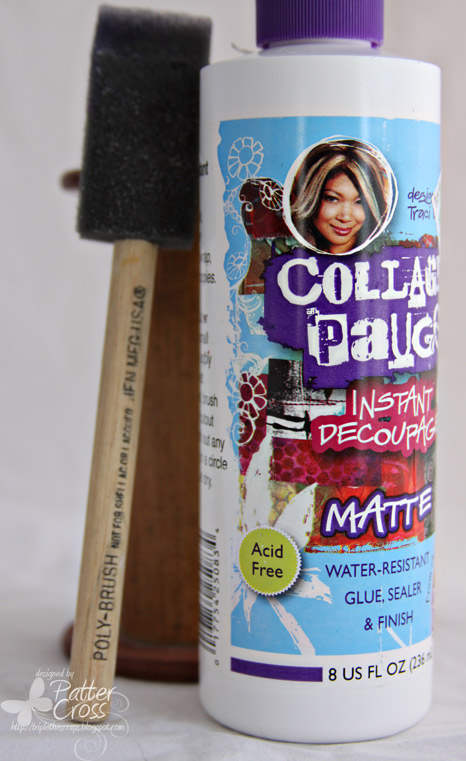
7. Once dry, I tap on a bit of Collage Pauge with a foam brush to seal it.

8. Cut out your stamped image and add to your Journaling Bible with a Uhu Glue Stick. I sew on these pieces a lot before adding to my Bible. Here are a few samples of stamped images on deli paper in my Journaling Bible.

Notice on most of these, you cannot even see the deli paper or the stamped gesso! It is wonderful to use in your Bible. Also, look at the back 'God's hand' in my Bible. There is no bleed through because the stamped image is on the deli paper. Love that.

Other Ideas Using Deli Paper
Sandi Keene has a wonderful deli paper flower video tutorial on YouTube. Click here to watch it. 

Lindsay Weirich also has a very cool tutorial on how to do backgrounds with deli paper. Click here to watch that tutorial.

Also be sure to search YouTube and Pinterest using the keywords 'deli paper'. There are lots of other ideas out there. Have fun, and I hope this has been helpful!

Monday, September 8, 2014

Painted Journal and Bookmark

Well, for those of you that know me, you know I have been in Bible Study Fellowship since 1997. You also know that I make a new notebook each year for my study notes. I have an amazing bookshelf full of wonderful notes from all of these classes since 1997. Since classes start this week, I wanted to share my 2014-2015 notebook with you along with a matching bookmark.

This year, I am using a Moleskine Soft Cover Squared Notebook. These have become my favorite notebooks. You can find them here on amazon. I decided to paint the notebook along with a piece of canvas to make the matching bookmark. If you haven't seen my canvas bookmarks before, click here. And here is how my everything turned out.

Front


Back

Matching Bookmark

I hope you have enjoyed today's creations. And as I said above, BSF classes start this week. We are studying the Life of Moses. And next year (2015-16) will be a new study on the Book of Revelation. If you are interested in finding a class near you, please click here. We have over 1,000 classes around the world for men, women, and children. There are also evening and day classes so that makes it even more convenient for the working or stay-at-home moms. I hope you will join us. Blessings,

Sunday, September 7, 2014

{SCRLLC14} Scripture Lesson #16, His Strength is Perfect

This is a new song to me; maybe it will be new for some of you too. It is called "His Strength is Perfect" by Steven Curtis Chapman and Jerry Salley. It was written in 1988 and has been published in some Baptist Hymnals since 2008. This song talks about assurance, security, confidence, rest, and shares some attributes of God. You can listen to the song by clicking here. The video is a live performance of Steven Curtis Chapman singing this song. The person filming this has trouble holding onto their camera; however, I really love this live performance by him. It is more incredible and touching to me to watch him sing it live. I hope it doesn't bother you too much. And here are the lyrics:

"I can do all things
Through Christ who gives me strength
But sometimes I wonder what He can do through me 
No great success to show 
No glory on my own 
Yet in my weakness 
He is there to let me know 

Chorus
His strength is perfect when our strength is gone 
He'll carry us when we can't carry on 
Raised in His power, the weak become strong 
His strength is perfect, His strength is perfect 

We can only know 
The power that He holds 
When we truly see how deep our weakness goes 
His strength in us begins 
Where ours comes to an end 
He hears our humble cry and proves again 

Chorus repeat"

I found this song by doing a search on the word 'peace'. I was looking for peace and strength particularly for my daughter this week as she had a spinal nerve root block on Thursday. She is normally extremely anxious in these situations but instead as the day arrived, she was completely covered in His peace. So many people were praying for her. For me as an "observer," I was in awe watching Him work in her. I know how she normally handles these things, and the only explanation for what I saw Thursday was that God was holding her hand, He will filling her with His peace, and giving her His strength. His strength is perfect!

1 Chronicles 16:11 "Look to the Lord and His strength; seek His face always."

Psalm 28:7 "The Lord is my strength and my shield; my heart trusts in Him, and he helps me. My heart leaps for joy, and with my song I praise Him."

Psalm 37:24 "Though He may stumble, He will not fall, for the Lord upholds him with His hand."

Proverbs 18:10 "The name of the Lord is a fortified tower; the righteous run to it and are safe."

Philippians 4:13 "I can do all this through Him who gives me strength."

1 Peter 5:7 "Cast all your anxiety on Him because He cares for you."

Isaiah 40:29-31 says "He gives strength to the weary and increases the power of the weak. Even youths grow tired and weary, and young men stumble and fall; but those who hope in the Lord will renew their strength. They will soar on wings like eagles; they will run and not grow weary, they will walk and not be faint.

I love that passage! When we are weary, He gives us His strength, and He gives us His power. God is greater than our most impossible task. What are you facing this week, this month, this year? Turn to the Lord. He will strengthen you for anything you face now, tomorrow, and forever. So when you are faced with a trial, a difficult situation, a weak moment, etc., will you remember that His strength alone is perfect?

Mark the above verses in your Bible, share them with someone that may need them this week, post them on the mirrors around your house because rememberHis strength is perfect!

Instead of doing a 6x6 page this week, I chose to document it in my journaling Bible because of a verse God gave to me Thursday morning before we left for her procedure. I really love Psalm 28:7 but God gave me Psalm 37:24. When we moved in 2012 and we were looking for a new church home, the pastor of a church we visited shared Psalm 37:24 and said 

"God is in charge of everything. He orders our steps and holds our hand."

I was able to share that with my daughter along with the scripture and tell her that God was holding her hand. He would get her through the procedure. He was there with her, and He certainly was in a mighty way!

For this page, I used a piece of Blue Fern Studios chipboard. Do you see it? It's the royal blue leaves to the left of the tag that says "remember." That is a portion of the chipboard piece called "Leafy Bough" which is a beautiful piece and can be used in so many different ways. I peeled off one thin layer of the chipboard, painted it, and used a glue stick to put it in my Bible. The thickness of the chipboard would normally be too much for a Bible but there is always a way to separate it and make it thinner to use in my Bible. Love that!
I also journaled the date of the sermon back in 2012 and the date God gave me this verse again and how He used it. I felt it was important to also journal that for the generations to come and for my daughter to remember how His strength got her through.

Paper: Kabnet Wax deli paper
Stamps: Technique Tuesday Scrapbook It, Our Daily Bread Designs God's Hands, Hero Arts Painted Circle, Heidi Swapp date stamp
Stamp Ink: Archival Manganese Blue, Archival jet black
Blue Fern Studios chipboard: Leafy Bough (painted with Adirondack Dabber sail boat blue)
Embellishments: Chic Tags, Sn@p! sticker letters, October Afternoon sticky keys peacock blue stickers, Cosmo Cricket tiny type stickers, sewing machine

Remember to use Keyword SCRLLC14 when posting your creations in any online galleries. Also, please leave a link to your creation here using Inlinkz! To see all of the information regarding this challenge and the previous studies, please see this post here. Blessings, and I pray this week that you will rely on His strength in all situations!
Friday, September 5, 2014

Organizational {Friday} Peerless Watercolors


Peerless Watercolors are wonderful and portable. I searched YouTube for the best way to store these beautiful watercolors but still wanted something slightly different. Also, most things I found used cardstock, and I was afraid it would just get bent up especially if I travel with this. And I must say that sometimes it pays 'not' to purge your older supplies because I had the perfect things on hand to store and use these new paints.

If you are unfamiliar with these paints, they were developed back in 1885 by Charles F. Nicholson. The formula he created 120 years ago is the formula still used today to create these colors. How cool is that? They blend beautifully and are great for travel because the color is on a small sheet of paper. The colors are acid free and non-toxic. Click here to see the products available. I purchased the Small Peerless Bonus Pak because it has 40 colors, and it's really all I need.

When the paints arrived, they came in a small clear envelope. The paints are flat sheets of dry color so it wasn't a big envelope. These sheets are a bit hard to use this way because you always have to flip through them to find the color you want. Also, the color on the sheet is very different from what the color actually looks like. And if you have any sort of dampness on your hands, you will start to lift color off of the sheets. That is why most people feel that they need to make a palette of some sort.

First, I found a great plastic box I had lying in my studio. It fits these 2" x 2" sheets perfectly. This is where I will store the original sheets, and when I need to make a new square of color for my palette, I can easily grab it from this box. But for the most part, this box will be stored in a drawer in my studio and only used for replenishing my palette.

Now let's look at the palette I created. This is where my old stash came into use. I found an old 4" x 4" clear acrylic album by Pageframe Designs in one of my cabinets. Remember those? Unfortunately, it is no longer available but Clear Scraps makes a similiar album that is available and should work perfectly for this also. Click here to see that album.

To make my palette, here is a list of supplies I used:

*Acrylic album
*1 1/2" punch square punch to make watercolor paper squares
*1" square punch to punch 1" pieces of the Peerless watercolors
*Glue dots or other adhesive
*Waterbrush
*Acetate sheets to put between your pages (the video below shows this nicely).
*Large rubberband

And here are the step-by-step instructions to create your album.

1. To create the color palette squares, punch forty 1 1/2" squares of watercolor paper.
2. Write or type each watercolor name onto each punched square.
3. Next, punch a 1" square piece of each Peerless watercolor and adhere to the appropriate 1 1/2" square made above using a Glue Dot or other adhesive.
4. Use your waterbrush to create a color sample on the side of each color palette.
5. You should then end up with 40 usable squares like this:

6. Next put them in color order. I put mine as follows: yellow, orange, green, blue, purple, pink, red, brown, black.
7. Determine how many squares you will put on each album page. For my 4x4 album, I put four squares on each acrylic page.
8. Adhere each color to the page using a Glue Dot or other adhesive. I chose to use Glue Dots because they will be easy to remove.
9. When finished, add a cover page if desired and secure album with a rubberband.
10. Store the waterbrush in the metal ring binding of the album.

Here is the finished product:

And now, here is a quick video flip-through so that you can see this album in action. I hope you enjoy it!


Thanks for stopping by, and I hope you have found today's post helpful. Blessings,

Thursday, September 4, 2014

Journaling {Bible} Matthew 28:1-10

As I continue to go through old sermon notes, I keep finding gems that our pastor has shared as we have studies God's Word. This particular passage he shared at Easter. I just loved what he said in response to Mary Magdalene and the other Mary as they ran quickly and filled with joy to tell the disciples that Jesus had risen from the dead. That quick and immediate obedience along with their unwavering faith truly speaks to me. They acted on their faith, and that faith was visibly evident. How quickly do I obey? Would I have had such faith and gone on like they did? Do people visibly see Him in all I do? Our pastor shared this thought and how this passage applies to us:

"My faith and obedience extends the gospel message. It is visible evidence. Go and tell."

Matthew 28:7-8 "Then go quickly and tell His disciples: ‘He has risen from the dead and is going ahead of you into Galilee. There you will see Him.’ Now I have told you.” So the women hurried away from the tomb, afraid yet filled with joy, and ran to tell His disciples."

 And here is how I journaled this in my Bible:


A few things about this page. First, I have change journaling Bibles. I was previously using the ESV Journaling Bible but changed this week to the HCSB Notetaker's Bible because the font is so much easier on my eyes. Even though this is not my study Bible, I was still having trouble finding the verses to highlight in the ESV Bible. The font is just way too small. I am still praying about what to do with that Bible but from now on, you will see this new, larger font Bible being used.

Also, previously I did not note where the teaching came from. I am now not only noting the date but also who shared the teaching with me. I plan on putting teachings from our pastor, BSF, and other places in this same Bible. It will be wonderful to look back and remember who shared that particular teaching with me.

And be watching on Tuesday. I will share how I am using the deli paper in this Bible. I will give you a few tips that I hope you will find helpful. Thanks for stopping by, and have a joyous Thursday!

Tuesday, September 2, 2014

It's Sketch Time!

I am excited to share the newest Blue Fern Studios sketch challenge with you. Have you played along yet in any of the challenges? Oh I hope so! You can do anything with these sketches! I turn these 12x12 sketches into 8 1/2 x 11 layouts, art journal pages, and cards. Today I am going to share a card with you that I created using the September Sketch.
To cover the Roman Clock set chipboard, I put on a layer of gesso. Then I spritzed with three different colors of Prima Color Bloom Mists to match the Blue Fern Studios Ombre Dreams paper.
Papers: Blue Fern Studios Ombre Dreams, Memory Box nc 
Stamp: Anna Griffin Chalkboard Sentiment Stamp 
Stamp Ink: Jenni Bowlin soap powder, Tim Holtz Distress Ink brushed corduroy 
Blue Fern Studios chipboard: Roman Clock Set Small (colored gesso and Prima Color Bloom Mists in soft teal, glistening waves, and lime wedge) 
Embellishments: Petaloo pistachio and teal botanica mini flowers, Tim Holtz mini paper clip, misc. doily, misc. lace,cheesecloth, sewing machine

And here is the gorgeous sketch.

To see all of the details and to play along, please see this post here. Thanks for stopping by, and I hope you will join in the fun and maybe even win the awesome prize package! Blessings,

Related Posts with Thumbnails