Thursday, January 22, 2015
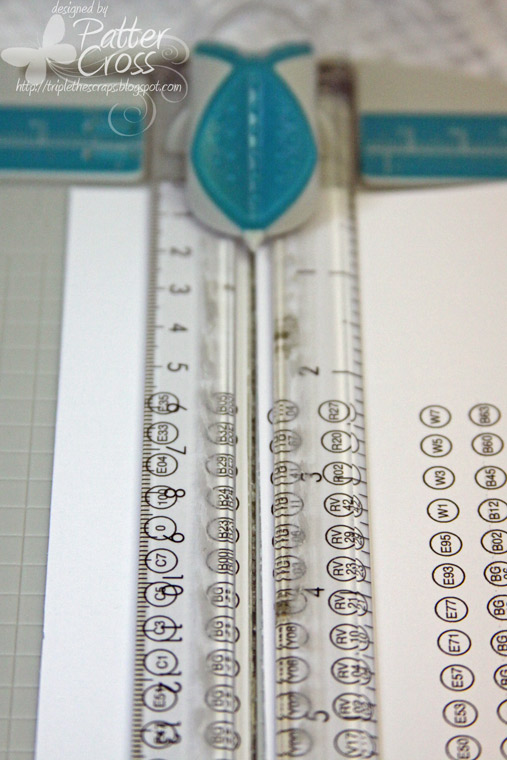
Tool for Your {Journaling Bible} and Other Creations!
Posted by
Patter Cross
at
11:42 AM
0
comments
Labels: Copic Markers, Glory Art Tips, Journaling Bible, Tuesday's Tip
Friday, July 22, 2011
Organizational {Friday} Color Idea Book
Keeping color swatches or color ideas can help in many ways. I have shared previously how I keep some of my color swatches. You can see those posts here:
*A Copic Swatch Book (look just past the printer's tray in this post)
*Color Idea Book/Rolodex
*Color Swatch Book (I am going to show this in detail in a future post as it has been updated.)
I use all 3 of these a lot especially the last book. I use it every time I create something! Today I wanted to share what I do with the ideas I get from Ellen Hutson. Of course, you can use this same idea for any color ideas that you get.
If you have ever shopped with Ellen Hutson, you know that she mails a zip lock bag with ribbon and a cute color card with every order. I have collected these color cards for several years. Recently I suggested to Ellen that she start noting the Copic colors she uses on these cards. I thought it would be GREAT to know exactly what she uses to color these images.
Now that I have collected several of these cards, I decided it was time to organize them. I purchased another Art Profolio from Hobby Lobby. This is the same portfolio I use for my Copic colors and swatches except it is 5x7 instead of 4x6 like this one.
These little portfolios are thin and barely take up any room. They are also easy to pack and travel with! Anyway, I then used some removable adhesive to stick the cards to each page. Here is what a few of them look like in the book:
These cards are just full of ideas--color combinations, coloring guides, etc. If I am ever stuck and need ideas, this little book may just get those juices flowing! Think of all of the different ideas you could put in one of these little portfolios! Love it!
Anyway, I hope you find a way to keep a little inspiration book like this. Now I don't have to shuffle these cards. I can see them easily in this cute small idea book. Have a great Friday, and thank for stopping by!
P.S. If you saw my post yesterday on my favorite art journaling products, check it again. I have already added a few more products to the "Miscellaneous Section" that I forgot to note yesterday. Eeek! :)
Friday, May 20, 2011
Organizational {Friday} Label those Copic Ciao Markers!
Recently I bought a bunch of Ciao markers. I decided to get them because of the price, and they were 30% off. The thing I don't like about Ciaos is that they do not have the color number on the end of the markers. Well, here is a blog post by Asela Hopkins that has a pdf file for you to print the labels for the end of the markers. How fun is that? So, I used her amazing file to label my new Ciao markers. Let's look specifically at what I did.
Printing the File
First, I printed the pdf file on X-Press It cardstock. The file is only half of a sheet so you will still have some cardstock to save. Once I printed the file, I trimmed the paper keeping two rows of labels on each strip. This way the strips would be easy to hold, punch, and store.
Preparing and Creating the Labels
Next, I used Mini Glue Dots, a 1/4" circle punch, and the marker itself to prepare the labels.
I first punched the label, attached it to the cap using a Mini Glue Dot, and then I colored the label with the marker so I can see the matching color instead of have white cardstock on the end of each label. Here is what a few of them look like after they have their new labels:
And here is how they look with Sketch markers in my storage unit:
Isn't it wonderful? I know I am going to love this. Yes, the print is tiny but it is better than nothing!! Also, I only put the labels on one end of each marker. I could certainly have done both ends but I didn't think it was necessary. I just need to make sure I put them away each time with the label showing.
Storing Extra Labels
Since I do not have many Ciao markers, I have kept the extra labels so that if I get anymore I will have them ready to go to label new markers. I decided the easiest way to store the extras was to put them in the back of my Copic swatch book using a binder clip. This will work perfectly.
Also, to note which markers are Ciao in my swatch book, I just circled the Ciao abbreviation in the book. Super simple. That way when I match a color I want to use I will easily know if I am looking for a Sketch marker or a Ciao marker. Look below at BG01 to see how I have marked each Ciao marker:
I hope this has been helpful to each of you, and a huge thanks to Asela Hopkins for creating the great pdf file! Have a blessed weekend ahead, and happy labeling!
Tuesday, April 19, 2011
Tuesday's {Tip} Got Spica?
You know me, I love my swatches for easy color matching. And now all my Copic swatches are still in one place! Have a blessed Tuesday!
Tuesday, March 29, 2011
Tuesday's {Tip} Copic Markers 50% Off!
This sale is too good not to share! I received my order already, and I thought you all may be interested as the sale is still going on! A Muse has 50% off everything in their online store. Not only are their stamps on sale but so are ALL of their Copic products! Now with that being said, they do not have the Copic Sketch Markers. They only have the Copic Ciao and the Copic Original Markers. I ordered Copic Originals! LOVE them! They still have the number on the the ends, they will still work with my airbrush system, and they hold a lot of ink! The only downfall to the Original Marker is that it does not have the brush nib. So, I ordered some nibs. I am going to replace the broad nib with the brush nib. This will work perfect for me! You can find the Copic sale here. **NOTE: You must use code "50gone."
Also, if you do not have the Copic Swatch Book, I highly recommend it! I like it better than any other swatch sheet! Easy to update, easy to match colors, easy to see what you have, etc. Love this little book! Thursday, February 24, 2011
{Miscellaneous Fun} Copics, a Layout, and Class!
Today I wanted to share several things with you from Memory Box Co. and Scrapbook.com. First let's look at some Memory Box fun!
Memory Box
I wanted to share another 8x8 layout I created for Memory Box. I had fun creating the stamped corners on my cardstock using one of the newest stamps. To see how I created the corners, a list of products used, close-up photos, etc., please see my post here.

Next, I will be teaching a Memory Box Altered Printers Tray workshop in March. If any of you are in the area, I would love to have you join me! To see complete workshop details, please see this post here. Here is a photo of the tray we will be making:
Scrapbook.comMany of you know that I became a Copic Certified Designer last year after attending a wonderful training class with Marianne Walker, Jenn Balcer, and Sharon Harnist. Well, Scrapbook.com is now carrying the complete Copic line, and I will be doing specialized Copic articles for them. I will share them here as they are published as I am hoping you find them helpful! The first two articles were published on 2/11/11 so I thought I would share them today. Click on the article title to read the full article.
Copic Markers--Choosing the Right Paper

Copic Markers--Choosing Stamp Inks
I hope you find the articles helpful. If you have questions about anything, please don't hesitate to post in the comment section or e-mail me. I will respond to question in the comment section just be sure to check back for my response. :) Have a blessed Thursday!
Posted by
Patter Cross
at
6:15 AM
11
comments
Labels: Altered Items, Articles, Copic Markers, Layouts, Memory Box Co.
Tuesday, January 11, 2011
Tuesday's {Tip} Coloring Twill Tape
Most of us have seen the colored seam binding or Hug Snug around the web. It really adds to a creation and is so fun to make. In fact, I posted about it last June and shared the different ways to color the seam binding. If you missed that post, you can see it here. Well, did you know that you can also color twill? I have been playing with it, and I LOVE coloring twill!!! Twill is also cheap just like Hug Snug (seam binding). Let's look at how I color twill.
Where to Buy
I buy my twill from Twilltape.com. I use their lightweight white cotton tape for coloring. I have not tried to color the heavier tape. I also have not tried to color the natural tape but I have that on order and will give it a try when it gets here. The rolls from Twilltape.com are huge--72 yards for $8-$16 depending on the width of the twill.
How to Color the Twill
I color the twill the same way I color Hug Snug. First, I spritz the twill with water to get it damp. Then I spritz with Glimmer Mist. Glimmer Mist is my favorite coloring medium for twill. Here is a piece of white twill after I spritzed it with suede Glimmer Mist:
I needed this particular piece rather fast, so I decided to dry it with my heat tool. Because I didn't want to burn my fingers, I scrunched up the twill and held it with a wooden clothespin to dry it. It worked perfectly.
Here you can see this colored piece used on a Copic creation I made for an upcoming article:
Papers: X-Press It, Anna Griffin
Stamps: Serendipity Stamps Three Dresses
Stamp Ink: Memento rich cocoa, Tim Holtz Distress Ink walnut stain
Copic Markers: B23, B24, B26, R81, R83, R85, G21, G24, G40, YG67, E00, C1, and 0 (colorless blender)
Embellishments: Spellbinders scalloped rectangle dies, Glimmer Mist suede, Tim Holtz tiny attacher, Paper Trey Ink button and rustic twine, misc. cardboard, clothespins, jute from Hobby Lobby
And here is some twill colored with pink taffy Glimmer Mist. This is for a card I will teach in a Memory Box class later this month.
Papers: Memory Box sugar plum notecard and envelope, Memory Box Pixie, Paper Trey Ink cs
Stamps: Memory Box Love & Hearts B1423, Memory Box Heart Bird Keepsake F1439
Stamp Ink: Memento rose bud
Embellishments: twill colored with pink taffy Glimmer Mist, Glossy Accents, Paper Trey Ink button
I hope you will try coloring some twill. It really is fun and creates a perfectly matched ribbon for your creation!
Also, I hope you will be playing along with us at Our Daily Bread Designs and submitting a layout to our first scrapbook challenge. You have until January 31st to enter, and so far there are no entries. :( :( Kelley is generously giving away a $25 gift certificate to ODBD so I hope you will play along! You can see all of the details in this post here. Thanks for stopping by today, and let me know what you think of the twill. Blessings,
Posted by
Patter Cross
at
5:30 AM
5
comments
Labels: Altered Items, Copic Markers, Memory Box Co., Tuesday's Tip
Saturday, October 9, 2010
Our Daily Bread Designs {Challenge 32}
Welcome back to another challenge week! It feels great to be back with another challenge for you! This week's challenge is Leaf It--Use leaves on your creation, it can be a part of your patterned paper, your image, your charms, just so it has leaves on it (gold leafing does not count as leaves unless it is a leaf itself).
I created this "leafy" card for my parent's as a thank you for a very precious gift they surprised my husband and I with a few weeks ago. This card doesn't even begin to express the "thanks" I truly wanted to give them but I did poured my heart into this card!! I got my finger stuck under the needle in my sewing machine and bled everywhere. Thank goodness it didn't get on the card! LOL! Let's see, I have been sewing for about 33 years, and I have never done that before. I guess this truly is a special card! :) Anyway, I used the ODBD set "The Lord Has Risen" since it has beautiful leaves on the image. Then I also used part of a sentiment from the ODBD "The Living Bread" set. To color my image, I used Copics and colored pencils. :)
Papers: X-Press It, 7Gypsies Conservatory, Paper Trey Ink cs
Stamps: Our Daily Bread Designs The Lord Has Risen, Our Daily Bread Designs The Living Bread
Stamp Ink: Memento bamboo leaves, Ranger clear ep
Embellishments: Copic Y21, Y26, G40; Spellbinders Large Labels; PrismaColor kelp green & ginger root; Cuttlebug Victoria embossing folder; Stickles frosted lace; Zva Creative brad and pearl flourish, satin ribbon from Stamp Simply, sewing machine
If you would like to see more challenge creations, please be sure to check out the other ODBD Challenge Team creations here:
Chris Olsen
Chris Dickinson
Francie Gumprecht
Sabrina Jackson
To see all of the challenge and prize details, please see the ODBD blog post here. Yes, there are prizes, so you don't want to miss the details! Also please don't forget to upload your creations to Mister Linky in the same post by Thursday, October 14th, at 8 p.m. EST to be eligible! Remember to use Keyword ODBDSLC32 when posting to online galleries. Thanks for stopping by, and blessings to each of you!
Posted by
Patter Cross
at
5:58 AM
5
comments
Labels: Cards, Copic Markers, Our Daily Bread Designs, Zva Creative
Saturday, July 17, 2010
Our Daily Bread Designs {Challenge 21}
Do you like to color? I love to color. The night before I was married, my sister and I sat at my grandmother's kitchen counter and colored in coloring books with Crayons! How fun!!! And for others of you that love to color like me, this week's ODBD Challenge is for you! This week you need to use and image you can color and color it.
For my image, I chose flowers. I love flowers though if they are left under my care, they will die! LOL! And since pink is my favorite color, I thought it only appropriate to color them in shades of pink. I used the ODBD set called Grow in Grace. I also used the awesome Zva Creative pearl flourishes also sold in the ODBD store. Love these pearls! The papers are a mix of October Afternoon, Bazzill, and Paper Trey Ink. :) 
Papers: Bazzill brown cs, Paper Trey Ink white cs, October Afternoon Fly a Kite
Stamps: Our Daily Bread Designs Grow in Grace
Stamp Ink: Memento bamboo leaves and new sprout
Embellishments: Ellen Hutson lace; Copic RV10, G40, and G82; Distress Stickles worn lipstick; Basic Grey button; Zva Creative pearl flourishes; Kaiser Craft pearls; sewing machine
If you would like to see what the rest of the team colored, please be sure to check out the other ODBD Challenge Team creations here:
Chris Olsen
Chris Dickinson
Christine Okken (This is her last week with us. Be sure to leave her a comment!)
Francie Gumprecht
Sabrina Jackson
Have fun coloring, and to see all of the details and prizes for this week's challenge, see the ODBD blog post here. Also don't forget to upload your creations to Mister Linky in the same post by July 22nd at 8 p.m. EST! And remember to use Keyword ODBDSLC21 when posting to online galleries. Thanks for stopping by, and blessings to each of you!
Posted by
Patter Cross
at
5:58 AM
5
comments
Labels: Cards, Copic Markers, Our Daily Bread Designs, Zva Creative
Friday, May 28, 2010
Organizational {Friday} Copic Cubbie
The Cubbies!
First, the measurements of these cubbies are: 4 5/16" W x 14" H x 5 1/2" D. I had a very small space between my paper rack and my Scrap 'n Cube drawers that I thought would be perfect for one or two cubbies. I measured the space, and I found that it was 4 1/4" wide. Wow, just 3/16" of an inch larger than the cubbie. PERFECT! So, I decided to order two cubbies and stack them in the space. Here is how they look:

Aren't they perfect? Each unit holds 120 Copic Sketch markers but will also hold other markers or colored pencils. So, my two units here will hold 240 Copic Sketch markers! Wow! Several things I love about these cubbies:**The shelves are slightly angled down so other markers don't fall out when you remove one.
**They are small and don't take up a lot of room.
**They store tons of markers in a small space.
**They are easy to put on your desk so that you can access your markers quickly and easily!
**They are an inexpensive storage solution at only $16.95 a cubbie!
Organizing the Shelves
Now, let's look at how I organized them. I gave some color families their own shelf because I have a lot of markers in that color family. For instance, here is my blue shelf:
I then organized them by number within the "family" so I can easily see what I have and grab what I need.Some color families I combined on a shelf. For instance, I don't have a lot of green or yellow green so I combined those markers on a shelf. I then put them in number order also.
Labeling the ShelvesOh, I really wanted to label these shelves. I love my labels but it just didn't work out. Everything I tried got in the way of the markers. Do I need labels? No, not at all. It is very easy to see and read the marker name/number but I just wanted them because labels look so nice. Oh well!
Stacking the Cubbies
Stacking the cubbies has worked great; however, if they were not "sandwiched" between my paper rack and my Scrap 'n Cube, I would definitely screw backets on the back to keep them from moving. I did decide to put a small piece of non-slip shelf liner between the two units. That way I can be sure the top one doesn't move between my "sandwiched furniture." :) You can see a small edge of the liner here in this photo:
I hope this post has been helpful. If you are looking for marker storage, pencil storage, etc., I highly recommend these Color Cubbies! Have a great Friday, and thanks for stopping by!Friday, May 21, 2010
Organizational {Friday} Copic Markers
So, before I head off to class, I needed to look at my Copic stash which then has caused me to change my storage because I ran out of room after ordering more markers! Eeek! Today, I am going to share FOUR different Copic marker storage options. Here is my favorite way to store my Copic markers:
This is a Stampin' Things Elite Unit. It holds my Copic Sketch markers beautifully! LOVE it! This unit will hold 96 Copic Sketch markers (48 markers per side). However, I ran out of spaces for markers. Yes, I could order another Stampin' Things unit but I don't really have room in my new room. So, in order to keep my markers together, I moved them all to a CTMH storage box that I had on hand. This will hold 120 markers. Well, once my new markers come in, I will have more markers than this box will hold. Ugh! But it certainly makes a GREAT and cheap storage option! 
A little bit about this box before I tell you what I am moving to. Can you see the white pieces of cardstock between each set of 4 markers? I did this to keep the markers from getting out of order. Yes, I like mine in order and not just thrown in the box. When I didn't use the cardstock dividers, the markers really fell all over and were not as neat as I like to keep them. This works pretty well. If my markers were going to stay permanently in this box, I might have added chipboard or something sturdier as dividers instead of cardstock.So, since this box will not be large enough, I have ordered two Color Cubbies from Studio 3 Solutions. UPS says they will be delivered on Tuesday. Yeah! They are $16.95 each, and they will also hold 120 sketch markers per unit. This is a great and inexpensive way to store your Copics or other markers or pencils!
**Photo used with permission from Tami of Studio 3 Solutions.The 4th way to store Copics is in a bucket or bin. I personally have the pink marker bin from A*Muse. I love it too but it already contains my colored pencils, watercolor pencils, and other things. I love that bucket! I didn't want to switch out what I have in there so I left the bucket "as is." You can see these cool buckets here. I love all of the color options!
Next Friday, I will show you how the new Color Cubbie units works out with my personal photos. I am sure I will label each shelf in some way also with the color family! I can't have something without labels! LOL!
Thanks for stopping by, and be sure to join me next Friday when I share my Color Cubbies all filled and labeled! Blessings,


A Muse does not sell it but you can buy it many places online. I purchased mine from Icopic.com. I hope you find this sale information helpful. Have a blessed week ahead!